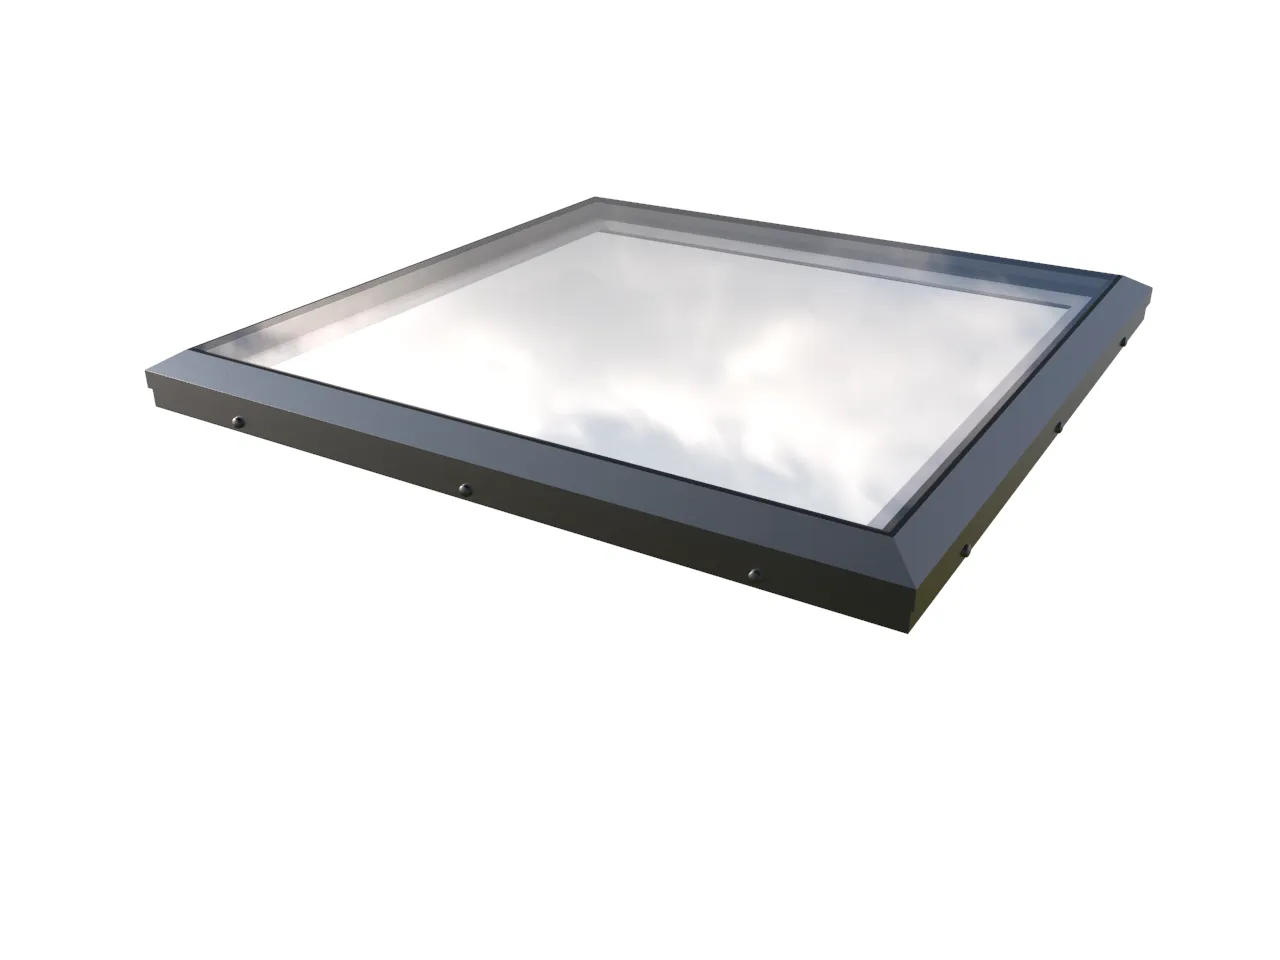
Brett Martin Flat Rooflight Installation Guide: A Step-by-Step Walkthrough

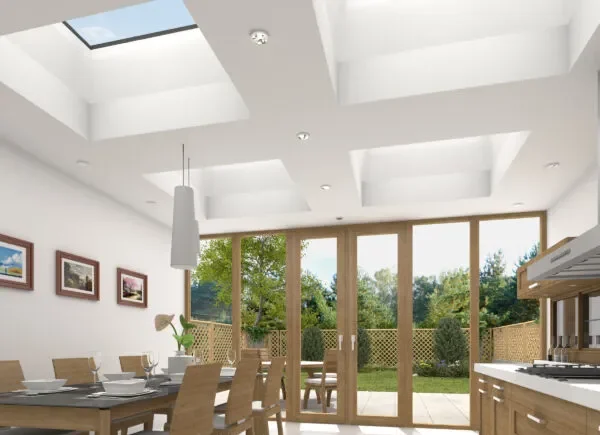
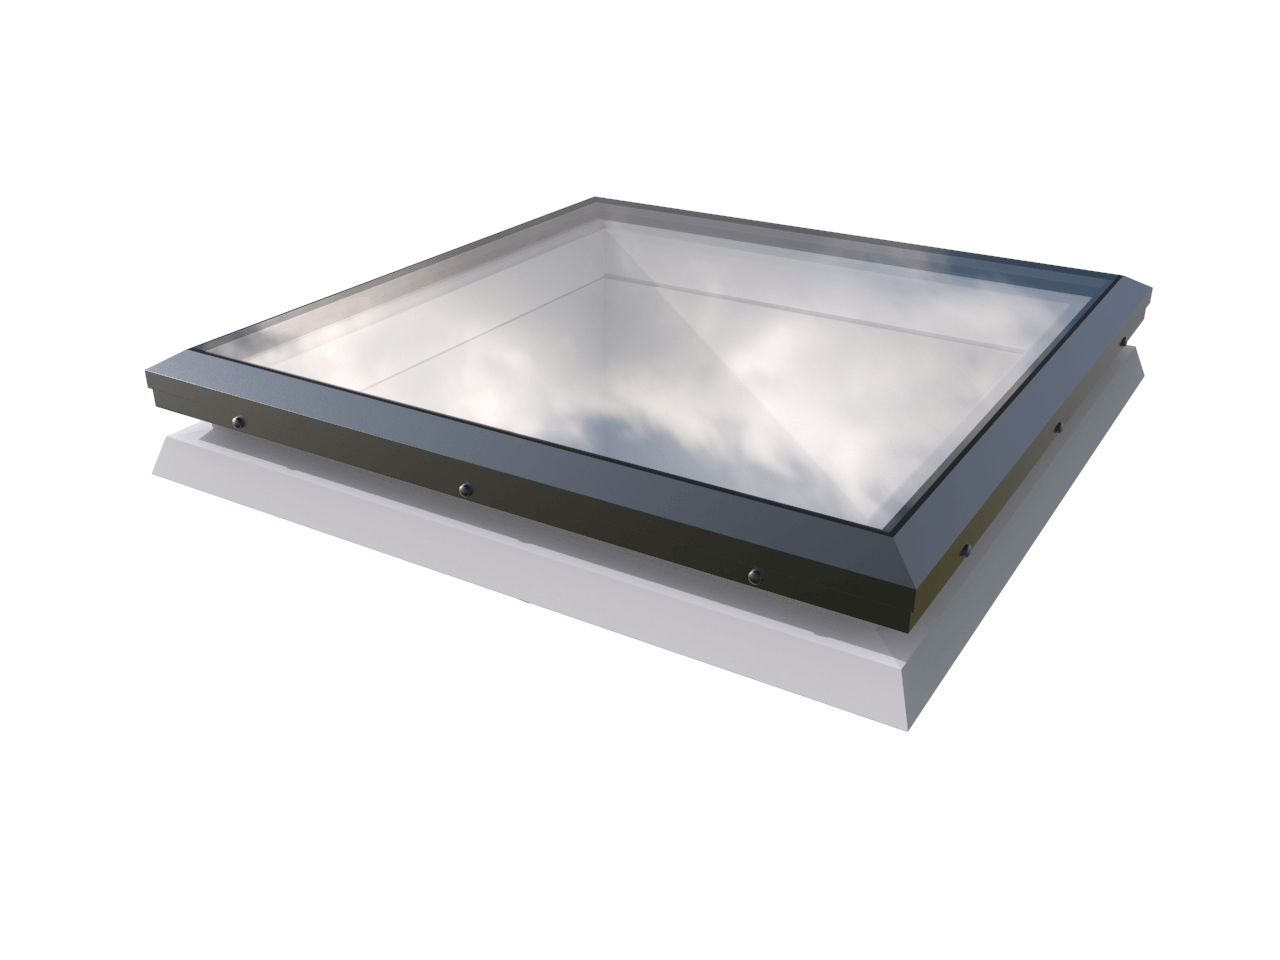
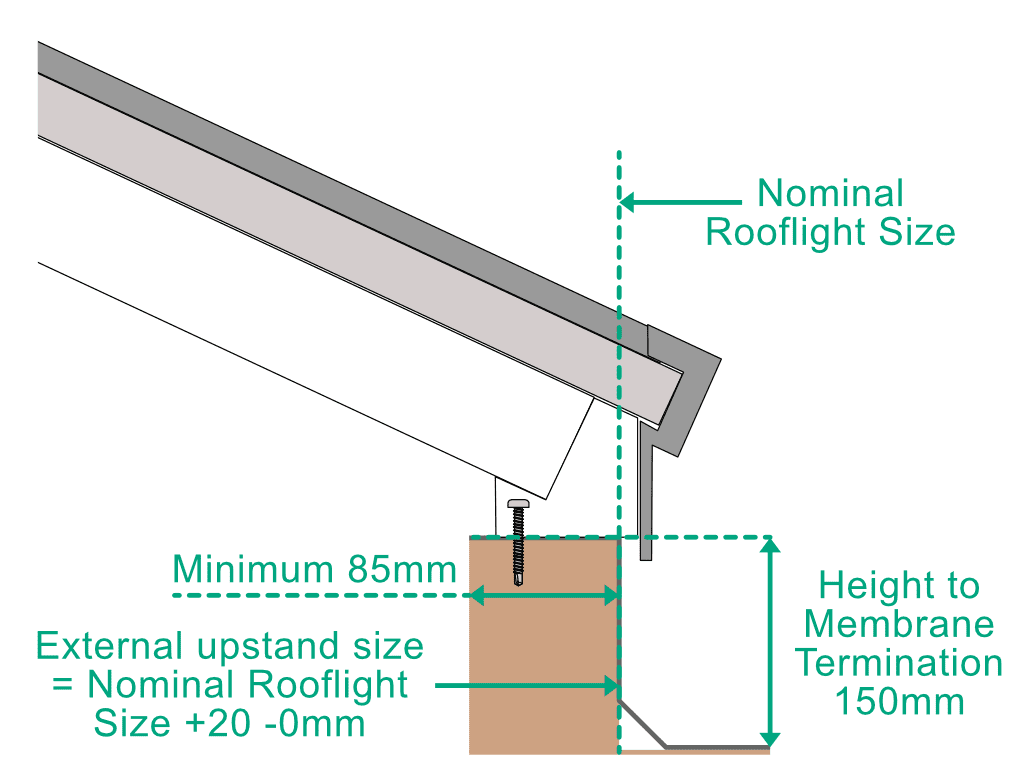
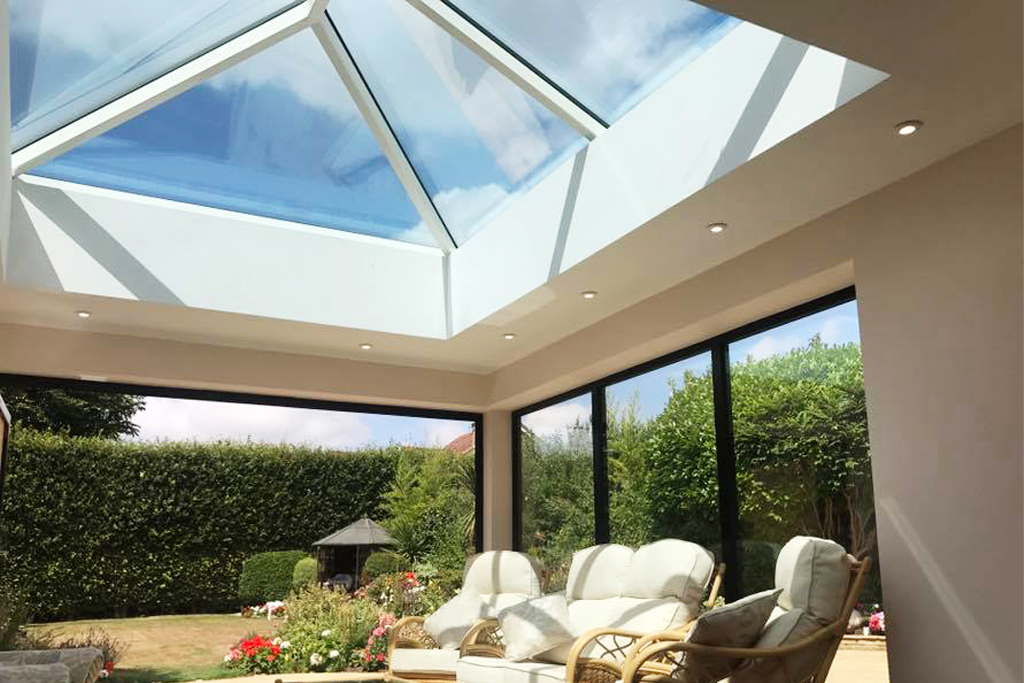
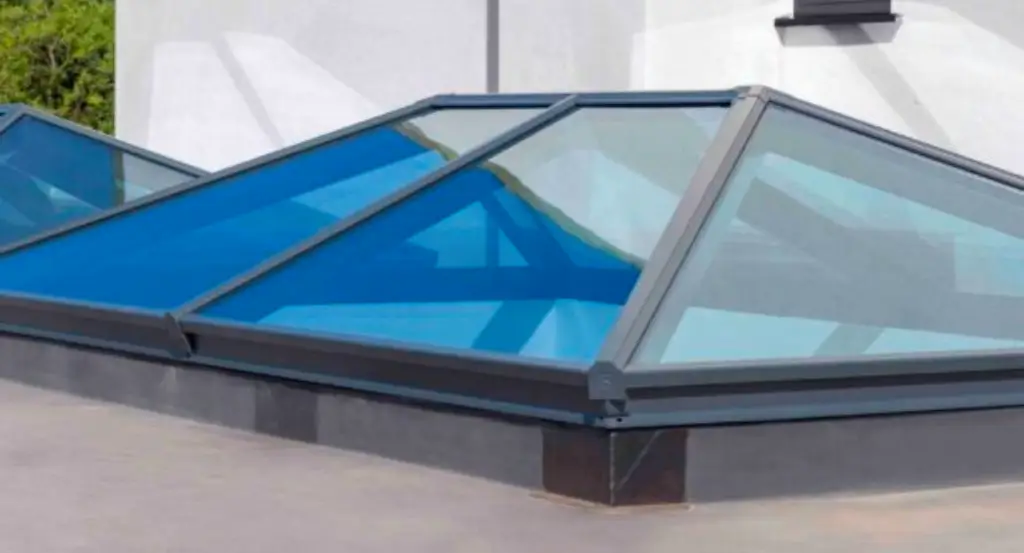
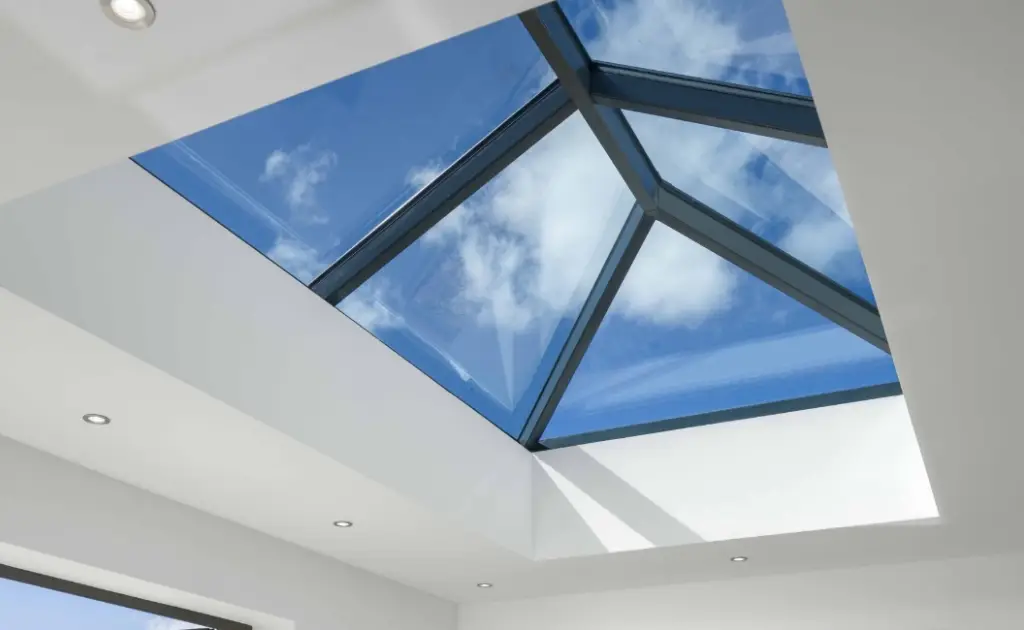
The Brett Martin Flat Rooflight is a popular choice for homeowners and professionals seeking a sleek, modern solution for bringing natural daylight into flat roof spaces. Designed for ease of installation, excellent thermal performance and clean aesthetics, it is suitable for both domestic and commercial projects. Whether you are a homeowner looking to understand what is involved, or an installer preparing for the fitting process, this guide provides a clear, step-by-step overview of how a Brett Martin Flat Rooflight is installed and what to expect at each stage. 

Understanding the Brett Martin Flat Rooflight System 

Brett Martin Flat Rooflights are manufactured using a thermally broken aluminium frame paired with high-performance, double-glazed glass. The internal pane is laminated for safety, while the external pane is toughened for durability. This combination delivers excellent insulation, safety and longevity. 

The rooflight is designed to sit on a builder’s upstand or proprietary kerb, creating a low-profile, contemporary finish that sits neatly above the roof surface. Available in fixed, manual opening or electrically opening options, the system suits a wide range of applications. View the full Brett Martin Flat Rooflight range.

Preparing the Roof Opening and Upstand 

Correct preparation of the roof opening is critical to a successful installation. Brett Martin rooflights are typically installed onto a timber upstand with a minimum height of 150mm above the finished roof level. 

Before installation, check that: 

– The upstand internal dimensions match the ordered rooflight size 

– All sides are square, level and structurally sound 

– The waterproof membrane is fully dressed and sealed up the upstand 

For more detailed guidance, refer to our flat rooflight upstand requirements page.

Positioning the Rooflight on the Upstand 

Once the upstand is prepared, the rooflight can be positioned. Brett Martin Flat Rooflights are supplied fully assembled. 

Steps: 

1. Lift the rooflight into position using appropriate equipment 

2. Carefully place it onto the upstand 

3. Check alignment and level

4. Fixing the Rooflight Securely 

Fix through the pre-drilled fixing points using suitable fixings for the upstand material. Tighten evenly to avoid frame distortion. 

Weatherproofing and Sealing 

Apply the recommended sealant between the rooflight frame and the upstand. Dress the roof membrane neatly up to the frame and ensure all junctions are fully sealed. 

Glazing Performance and Thermal Efficiency 

Brett Martin Flat Rooflights offer excellent thermal performance and may include solar control and self-cleaning glass. Learn more on our flat rooflight glass options

Final Checks and Maintenance Advice 

After installation: 

– Confirm all fixings are secure 

– Inspect seals and membrane junctions 

– Check operation of opening units 

Maintenance includes periodic cleaning and annual seal inspection.

Why Choose The Rooflight Centre? 

The Rooflight Centre is the e-commerce division of Lonsdale Metal Company, a fourth-generation family business founded in 1954. Learn more About The Rooflight Centre

We offer: 

– High-performance rooflights 

– Fair pricing 

– Fast delivery 

– Dedicated expert support 

Summary 

The Brett Martin Flat Rooflight provides a modern, reliable solution for flat roofs. For advice or support, contact our team.

Korniche Flat Rooflight Installation Guide: A Step-by-Step Walkthrough

The Korniche Flat Rooflight is a premium solution for flat and low-pitch roofs, offering a sleek, frameless appearance combined with excellent thermal performance. Designed with installer efficiency and homeowner appeal in mind, it provides a contemporary alternative to traditional dome rooflights. Whether you are installing the product or simply want to understand the process, this guide outlines each stage of a typical Korniche Flat Rooflight installation clearly and accurately. 

Understanding the Korniche Flat Rooflight System 

Korniche Flat Rooflights are manufactured using a thermally broken aluminium frame paired with high-performance, double-glazed safety glass. The minimalist external design allows the glass to sit flush with the roof surface, creating a modern, architectural finish. 

The system is designed to be installed onto a builder’s upstand or kerb and is supplied fully assembled, reducing installation time on site. View the Korniche Flat Rooflight range.

Preparing the Roof Opening and Upstand 

Correct upstand preparation is critical to performance. 

Key requirements: 

  • Minimum upstand height of 150mm above finished roof level 
  • Internal dimensions matching the ordered rooflight size 
  • Square, level construction 
  • Fully dressed waterproof membrane 

For further guidance, see flat rooflight upstand requirements.

Positioning the Rooflight 

The rooflight is delivered as a single unit. 

Steps: 

  • Lift into position using suitable equipment 
  • Lower evenly onto the upstand 
  • Check alignment and level 

Fixing the Rooflight 

Fix through designated fixing points using suitable fixings. Tighten evenly. 

Weatherproofing and Sealing

Apply recommended sealant and dress membrane neatly to the frame edge.

Glazing Performance 

Korniche Flat Rooflights offer excellent thermal efficiency. Learn more about glass options.

Final Checks and Maintenance 

  • Check fixings and seals 
  • Clean glass with mild soapy water 
  • Inspect annually 

Why Choose The Rooflight Centre? 

The Rooflight Centre is the e-commerce division of Lonsdale Metal Company, founded in 1954. Learn more About The Rooflight Centre.

We offer: 

  • High-performance rooflights 
  • Fair pricing 
  • Fast delivery 
  • Dedicated expert support 

Summary

The Korniche Flat Rooflight delivers a clean, modern solution for flat roofs. For advice or support, contact our team

Trade Guide to Roof Lantern Sizes: Choosing the Right Fit First Time

When it comes to roof lanterns, getting the sizing right the first time is essential. A roof lantern that fits perfectly not only looks better but performs better – offering optimal light, insulation, and watertight protection. For trade professionals and installers, the right measurements can be the difference between a seamless installation and a costly return visit. 

Continue reading “Trade Guide to Roof Lantern Sizes: Choosing the Right Fit First Time”

What Are the Benefits of Laminated Glass vs Toughened Glass? 

When choosing a rooflight, skylight, or roof window, the type of glass you select is one of the most important decisions you’ll make. Beyond looks, the glass determines how safe, durable, and comfortable your living space will be. Two of the most popular options are laminated glass and toughened glass – each offering unique benefits depending on your needs. 

Continue reading “What Are the Benefits of Laminated Glass vs Toughened Glass? “

What Is U-Value? Why It Matters for Windows & Roofs

What Is U-Value and Why It’s Important 

When choosing new windows, rooflights, or skylights for your home, you’ll often come across the term U-value. It’s one of the most important measurements to understand if you care about energy efficiency, comfort, and long-term savings. Simply put, U-value tells you how well a window or rooflight keeps heat inside your home. 

Continue reading “What Is U-Value? Why It Matters for Windows & Roofs”

Korniche Roof Lantern Measurement Guide

When it comes to installing a roof lantern, getting your measurements right the first time is absolutely essential. The Korniche Roof Lantern is one of the most advanced and precision-engineered products on the market – which means accuracy matters. Measuring correctly ensures a perfect fit, a watertight installation, and the stunning slimline finish that Korniche is known for. 

At The Rooflight Centre, we’ve created this practical measurement guide to help both homeowners and installers achieve the best results with Korniche roof lanterns. Follow the steps below to make sure your lantern fits seamlessly and performs exactly as designed. 

Explore our full range of Flat Roof Windows and Korniche roof lanterns today. 

Continue reading “Korniche Roof Lantern Measurement Guide”

3 Stunning Roof Light Designs Featuring Korniche, Brett Martin & Opening Rooflights

When it comes to transforming your home with natural light, few additions are as impactful as a roof light. At The Rooflight Centre, we specialise in premium solutions that bring brightness, style, and practicality to any living space. Whether you want a sleek, modern finish or a functional design that enhances comfort, our collections offer something for every home.

In this article, we’ll showcase three elegant roof light designs featuring Korniche, Brett Martin, and Opening Rooflights. Each range has unique advantages, from luxury aesthetics to long-lasting durability and versatile functionality. If you’re ready to discover how a roof light can transform your property, explore our full collection here: Rooflights and Skylights.

Continue reading “3 Stunning Roof Light Designs Featuring Korniche, Brett Martin & Opening Rooflights”
Spinner Loading your options